What the Heck is an Eyelash Curler and How It’ll Save Your Clumpy Mascara
If you’re like me, you’ve probably woken up with the wrong side of the bed hair, and now your mascara looks like Mr. Potato Head’s eyebrows. Fixing clumpy mascara is a nightmare, but don’t worry, I got you covered. Have you heard of eyelash curlers? They are one of the best makeup tools we have that can help fix your clumpy mascara.
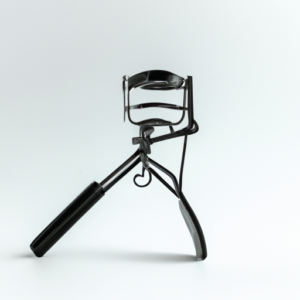
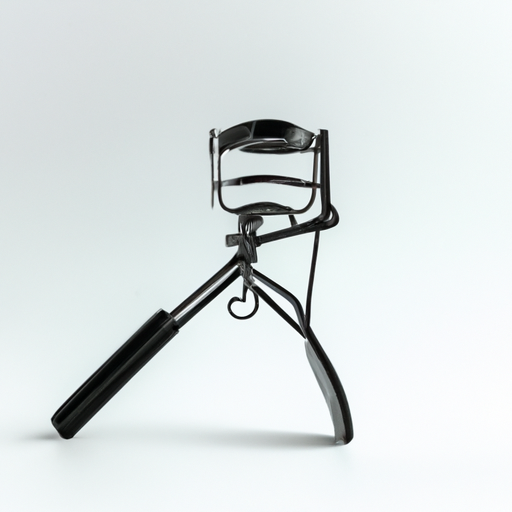
Eyelash curlers are a small beauty tool that looks like a pair of tongs for your lashes. They come in different shapes, sizes, and materials, but all have the same purpose: to give your lashes an instant lift and curl. Some people are intimidated by using one, but trust me; they’re super easy to use.
Not only do eyelash curlers help fix clumpy mascara, but they also enhance your overall eye makeup look. Curled lashes can make your eyes appear bigger and more awake, so it’s worth considering adding one to your makeup routine.
Getting the Lash Curler Ready for Action!
As someone who has struggled with clumpy mascara for years, I know how frustrating it can be when your lashes don’t look fabulous. However, with the right tools and techniques, it’s possible to achieve that beautiful, fluttery look you’ve been dreaming of. And one essential tool in any beauty kit is the lash curler! Here’s what you need to do to get your curler ready for action:
First things first, make sure your lash curler is nice and clean. Over time, it can accumulate old mascara and dirt, which can make it less effective when trying to curl your lashes. To clean it, use a cotton swab dipped in alcohol or makeup remover to wipe away any gunk.

Next, make sure the curler is in good condition. Check to see if the rubber pad is still intact and not worn out. If it is, it may be time to replace it. You want to make sure your curler is working properly so that you don’t accidentally pinch or pull your lashes.
Finally, warm up the curler for a few seconds using your hair dryer. This will help the metal curler hold its shape better and give your lashes a more long-lasting curl. Be sure to test the temperature on your hand before putting it near your eye to avoid any painful mishaps!
Alright, it’s time to move on to step two: applying the mascara. This is the fun part, but also the tricky part. If you’re not careful, you could end up with clumps all over your lashes, making it challenging to get that perfect look you’re going for. Don’t worry, though. I have some expert advice for you to avoid clumps and get beautifully voluminous lashes.
First things first, make sure your mascara is fresh. Old mascara can be clumpy and difficult to work with, so it’s best to replace it every three months. Also, choose a mascara that suits your eyelash type. If you have short lashes, go for a volumizing formula, and if you have long lashes, choose a lengthening formula. Mascara that is too thick or thin can cause clumps.
When applying the mascara, start at the base of your lashes and wiggle the wand back and forth to coat each lash. Then, sweep the wand through your lashes to the tips. You can repeat this step to add more volume if needed. Be careful not to apply too much mascara at once, as this can cause clumping.
One more crucial tip is to avoid pumping the wand in and out of the tube, as this can introduce air into the product and cause it to dry out faster. Instead, swirl the wand in the tube to pick up the product.
Now that you have a beautifully even coat of mascara, you’re ready to move on to the next step. But before we do that, check out this link for more tips and tricks on fixing clumpy mascara: https://winkseyelashboutique.com/fixing-clumpy-mascara-tips-tricks/. Trust me, you won’t regret it.
Step Three: Using the Lash Curler to Separate Clumps
Okay, here’s where the magic happens! Grab your trusty lash curler and clamp down on your lashes, as close to the base as possible. Make sure the curler is firmly in place and then gently squeeze and hold for about 10 seconds. Release and move the curler towards the tips of your lashes, repeating the process for maximum curl.
But wait, there’s more! Did you know that your lash curler can also help separate clumps? After applying your mascara, use the lash curler to gently wiggle and comb through any clumps. This will also help distribute the mascara evenly and give your lashes a more natural look.
Just be careful not to overdo it, as too much pressure could cause your lashes to break or fall out. And don’t forget to clean your lash curler regularly to avoid any bacteria build-up.
So there you have it – a quick and easy technique for using your lash curler to fix clumpy mascara. Trust me, once you try this trick, you’ll wonder how you ever lived without it!
Step Four: Finishing Touches!
Alright, we’re almost done! At this point, my lashes are looking great, but I always like to add a few extra touches to make them really pop.
First, I like to use a small brush to comb through any remaining clumps. This helps to separate the lashes and make them look even more defined.
Next, I’ll use a clean spoolie brush to lightly brush the tips of my lashes. This helps to fan them out and make them look longer.
Finally, I’ll use a bit of black eyeshadow or eyeliner on the outer corners of my eyes to really make them stand out. Just a tiny bit can go a long way!
And that’s it! With a few simple steps, we’ve gone from clumpy mascara to beautifully defined lashes. Give it a try and let me know how it works for you!
Conclusion: Time to Bat Those Lashes!
Well, there you have it ladies and gents, an easy solution to fix clumpy mascara. With just a simple lash curler, a few coats of your favorite mascara, and a little bit of patience, you can have perfectly curled, defined lashes in no time. But remember, always make sure to prepare your lash curler beforehand by heating it up for a few seconds, and be gentle when applying it to your lashes. Also, don’t forget to separate any clumps after applying mascara, not before. And lastly, add any finishing touches like a swipe of mascara on your bottom lashes or a touch of eyeliner to really make your eyes pop. I hope this little tutorial has been helpful and has given you some newfound confidence in your lash game. So go ahead and bat those luscious lashes with pride, my friends!
