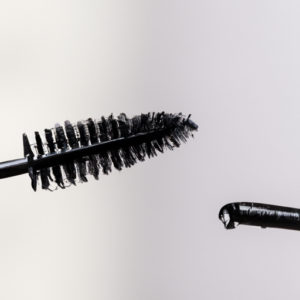
Get Your Lashes Ready: How to Apply Mascara Like a Pro
Hey there! Are you tired of clumpy and uneven mascara application? It’s time to step up your makeup game and learn some tips and tricks to achieve perfect lashes every time. Mascara is one of my must-have makeup products as it instantly opens up my eyes and adds definition to my look.
So, what exactly is mascara? It’s a cosmetic product used to darken, thicken, and lengthen the eyelashes. The purpose of mascara is to make your lashes look fuller and more voluminous, giving a wide-eyed, awake appearance to the face.
Correctly applying mascara can do wonders for your overall makeup look. It can make your eyes pop and give your face a dramatic, polished effect. But if you’re not using the right tools and techniques, you may end up with a mess of clumps and smudges.
Let’s Talk Mascara Basics
Okay, ladies (and gents), it’s time to get down to the nitty-gritty of mascara. There are so many types of mascaras out there, so let’s start by breaking them down. There’s lengthening, volumizing, curling, waterproof, and the list goes on. Each type has its unique benefits and its own set of tools for application. So, before we dive into how to apply those lashes flawlessly, let’s talk about the different types you might encounter.
First up is lengthening mascara. This type of mascara is perfect for those who are looking for extra length in their lashes. It’s designed to extend the lashes and give the appearance of longer, more fluttery lashes.

If you’re looking for volume, then volumizing mascara is what you want. This type of mascara is meant to thicken the lashes and give them a more full, dramatic look.
Curling mascara, as its name suggests, is designed to give the lashes a curl. If your natural lashes are stick straight, curling mascara is a must-have in your makeup kit.
Finally, waterproof mascara is perfect for those who want their lashes to stay put all day long. It’s designed to withstand water, sweat, and tears, making it ideal for those hot summer days or special events.
Now that you know the different types of mascaras, it’s time to figure out which one works best for you.
Prepping Your Peepers: Getting Your Eyes Ready for Mascara
Before you grab that mascara wand and start applying, it’s important to get your eyes prepped for the perfect mascara look.
First things first, make sure your eyes and lashes are clean. Removing any leftover makeup or oils from your lashes will prevent clumps and smudges from forming.
If you’re looking for a more dramatic look, consider curling your lashes before applying mascara. This will help open up your eyes and create the illusion of longer lashes. I always use an eyelash curler before mascara application.
Another key to preparing your eyes is to have the right tools. I always make sure to have a clean mascara wand on hand for application. Another option is to use a lash primer before mascara application. This will give your lashes an extra boost of volume and length.
Now that your eyes are prepped and ready to go, it’s time to move on to the fun part – applying mascara!
Getting It Right: Applying the Mascara
Now comes the fun part: actually applying the mascara. Let me tell you, there’s a technique to this that takes a bit of practice, but once you’ve got it down, you’ll be a pro.
First things first, make sure your mascara is open and ready to go. You don’t want to be digging around for it with one hand while juggling a mascara wand in the other.
Start with the bottom lashes. Hold the wand horizontally and apply the mascara by wiggling it back and forth. Don’t worry too much about getting full coverage on the first pass, we’ll come back to that.
Now for the top lashes. Hold the wand vertically and carefully apply the mascara to the outer corners of your lashes. This will create a natural winged effect. Then, starting from the root of your lash, wiggle the wand back and forth as you move upwards. One coat is usually enough for a natural look, but feel free to build more coverage if you want a more dramatic effect.
While you’re applying the mascara, keep a tissue underneath your lashes to catch any excess product that might fall on your skin. This will help prevent smudging and clumps.
If you do end up with any clumps, don’t panic. Take a clean, dry mascara wand and gently comb through your lashes to separate them.
Last but not least, re-curl your lashes if necessary. This will give them extra lift and length.
And that’s it! With a little bit of practice, you’ll be able to flawlessly apply mascara every time.
Finishing Touches
Finally, we’re down to the last bits of making your lashes look fabulous. After applying your mascara, you need to comb them out for any clumps or extra product. This can be done using a spoolie or lash comb. It’s best to comb upward gently, starting from the root of your lashes and moving outward toward the tip.
Another thing to consider is re-curling your lashes if needed. Sometimes the weight of the mascara can make them lose their curl. You can use an eyelash curler again but be careful not to pinch your lashes. When you clamp down on the curler, hold it in place for at least five seconds. If you mascara smudges during application, use a q-tip soaked in micellar water to clean up any smudges.
Remember, the goal is to make your lashes look full, long, and fluffy. Don’t be afraid to play with different types of mascaras, wands, or techniques to achieve the perfect look. If you’re interested in learning more tips on how to look good with just mascara, check out Winks Eyelash Boutique. Happy perfecting your mascara game!
Mascara Mastery: Tricks for Perfect Application
Wow, after reading all those steps, you’re probably thinking that applying mascara is an elaborate process. However, don’t worry, it only takes a few minutes to master this skill. Just find the right mascara for you, and follow these guidelines to achieve the perfect look. After applying your mascara, you may notice some clumps or excess product that hasn’t found its place on your lashes. Don’t fret! Use a clean mascara wand to comb through your lashes and remove any clumps or buildup. This will also help separate your lashes for a more natural look. If after combing your lashes, you find that they aren’t as curled as you’d like them to be, don’t hesitate to use your eyelash curler again. Just be gentle, as excessive curling can result in lash breakage or fall out. In conclusion, achieving the perfect mascara application is all about finding the right products, taking the time to prepare your lashes and eyes, and applying the mascara correctly. Whether you want a natural or bold look, follow these tips to achieve outstanding results!
