1. Introduction
Hey there, makeup mavens! Welcome to my blog where I’m gonna spill the tea on achieving the perfect bold eyes. So, what exactly are bold eyes, you may be wondering? Well, it’s all about rocking a fierce and attention-grabbing eye makeup look that is sure to turn heads. Get ready to dive into this tutorial, and I guarantee you’ll be slaying those bold eyes in no time!
Prep Work
Alrighty, it’s time to get started on prepping our gorgeous eyes for some boldness! Before diving into the fun stuff, it’s important to take a few steps to ensure our eyeshadow game is on point.
First off, let’s begin with a clean canvas. Wash that lovely face of yours with a gentle cleanser, making sure to remove any dirt or oils that could mess with the eyeshadow’s staying power. Once your face is squeaky clean, can’t forget to moisturize! Hydrated skin is happy skin, and that includes your eyelids.
Now that our face is fresh and moisturized, it’s prime time! Grab yourself an eyeshadow primer and apply a small amount onto your lids. This will not only help the eyeshadow pop, but it’ll also make it last longer. We want those colors to stay vibrant and in place all day long!
Application Basics
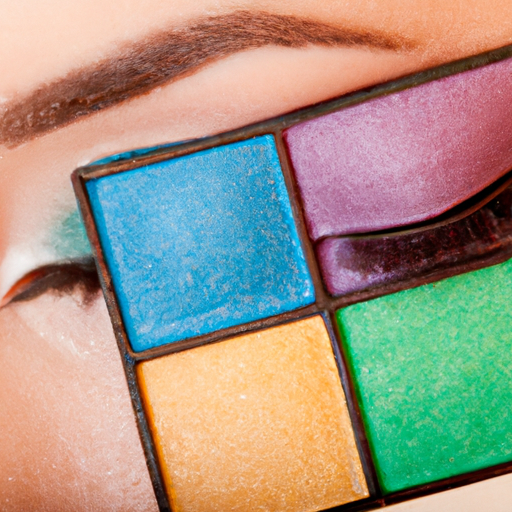
Alright, time to dive into the fun part – applying eyeshadow like a pro! Let’s start by talking about choosing the right colors. The key here is to consider your eye color and skin tone. For example, if you have blue eyes, warm shades like bronze and copper can make them pop. If you have a warm skin tone, go for earthy tones like browns and golds. Experiment and have fun!
Now that you’ve picked your eyeshadow colors, it’s time to apply them. Start by using a flat brush to gently pat the color onto your lid, building up the intensity as desired. Pro tip: tap off any excess product before applying to avoid fallout. Blend the colors together using a fluffy brush to create a seamless transition.
Don’t forget to define your crease! Grab a smaller brush and choose a slightly darker shade than the one you used on your lid. Apply this shade to the socket line and blend it upwards for a beautifully defined crease. This step adds depth and dimension to your eye look.
Now, let’s talk eyeliner. Whether you prefer a bold wing or a subtle line, eyeliner can really enhance your eye shape. Start by selecting your preferred type of eyeliner – liquid, pencil, or gel. Then, begin by drawing a thin line along your upper lash line, starting from the inner corner and extending it outward. For a winged look, extend the line slightly beyond the outer corner and flick it upwards. Remember, practice makes perfect!
Finishing Touches
We’re almost done! Time to add some finishing touches. One of my favorite steps is adding highlighter to the inner corner of the eye. This simple trick instantly brightens up your eyes and makes them appear larger. Grab a small brush and apply a shimmery highlight shade to the inner corner. Voila!
No eye look is complete without mascara. To achieve luscious lashes, start by curling them using an eyelash curler. Then, grab your favorite mascara wand and wiggle it from the roots to the tips of your lashes. Apply a few coats for maximum impact, and don’t forget your bottom lashes for a complete look.
And there you have it! You’re now ready to rock those bold eyes. Remember, practice makes perfect, so don’t be afraid to experiment and discover what works best for you. Have fun playing with different colors, techniques, and styles, and embrace your unique eye look.
4. Finishing Touches
Alright, folks, we’ve made it to the grand finale! It’s time to add those finishing touches that will make your eyes pop and turn heads. So, hold onto your brushes, because here we go!
Adding Highlighter
Now, this step might seem a bit extra, but trust me when I say it’s worth it. Grab your favorite highlighter and apply a teeny amount to the inner corners of your eyes. This will instantly brighten up your look and make your eyes appear bigger and more awake. I know, it’s like a magic trick for your face!
But wait, there’s more! Take that same highlighter and lightly dust it along your brow bone. This will add a gorgeous glow and create a lifted effect. So, get ready to shine bright like a diamond!
Adding Mascara
Ladies and gents, it’s time to bring on the drama! Pick up your trusty mascara and give your lashes some serious love. Start at the base and wiggle the wand as you work your way up for maximum volume and length. Shoot for the stars, I say!
Don’t be afraid to layer on multiple coats for that extra oomph. Just be sure to let each coat dry in between to avoid clumping. And remember, a good mascara can work wonders, so find one that works best for you. It’s all about those luscious lashes, baby!
Oh, and by the way, if you want even more expert tips and tricks, head over to Wink’s Eyelash Boutique. They’ve got all the inside scoop on creating bold, eye-catching eyes. Go check it out!
So there you have it, my friends. With these finishing touches, your bold eyes will be complete. Trust me, people won’t be able to look away! Now go out there and rock your fierce eye game. You’ve got this!
5. Conclusion
And there you have it, folks! We’ve reached the end of our journey to achieve those beautiful bold eyes. It’s been quite a ride, but I hope you’ve learned some valuable tips and tricks along the way. Remember, confidence is key when it comes to rocking any eye look, so don’t be afraid to experiment and have fun with your makeup.
Now, let’s recap what we’ve covered today. We started by defining what exactly bold eyes are all about – that striking, attention-grabbing gaze that makes heads turn. Then, we dove into the prep work, reminding ourselves of the importance of a clean face and moisturized skin before applying any makeup. We also touched on the significance of priming our lids for enhanced color payoff and longevity.
Next up, we delved into the application basics. We discussed the art of choosing the right eyeshadow colors that complement your skin tone and achieve the desired eye look. From there, we learned how to expertly apply eyeshadow, blending and building up the color for that intense impact.
Of course, no bold eye look is complete without defining the crease. We shared some tips on how to add dimension and depth to your eyes by expertly defining the crease with shades that create contrast and drama. And let’s not forget the crucial step of eyeliner application that adds that perfect finishing touch and helps to define your eyes even further.
Finally, we wrapped things up with the finishing touches. We learned about the power of highlighter to add that extra pop to your bold eye look. And of course, we couldn’t forget about mascara! A few coats of mascara can work wonders in making your lashes look fuller, longer and more dramatic.
So, my friends, with all these expert tips and tricks, I encourage you to go forth and channel your inner diva with those bold eyes. Remember, practice makes perfect, so don’t get discouraged if it takes a few tries to achieve the look of your dreams. Just keep experimenting, embracing your unique style, and eventually, you’ll have the confidence to rock those bold eyes like a pro.
Thank you for joining me on this beauty adventure, and until next time, keep shining bright!