
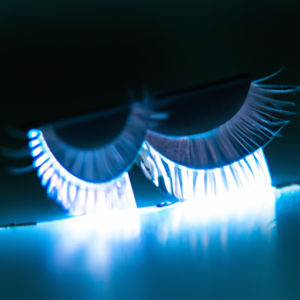
Are you ready to up your lash game? Let’s talk Magnetic Eyelashes
Hey there, beautiful! Are you tired of fussing with lash glue or applying falsies that just won’t stay put? Well, let me introduce you to magnetic eyelashes! These innovative lashes use tiny magnets to securely attach to your natural lashes, without damaging them. And the best part? They’re easy to apply!
But wait, there’s more! Magnetic eyelashes are also reusable, making them a cost-effective solution for those who want to add some va-va-voom to their lash game. Plus, they come in a variety of different lengths, styles, and colors, so you can find the perfect pair to match any look.
Now, you might be thinking… “But how do I apply them?” Don’t worry, I’ve got you covered! Follow these simple steps, and you’ll be a magnetic lash pro in no time. And for even more tips and tricks, be sure to check out winks eyelash boutique.
Step 1: Pick the Right Magnetic Eyelashes that Suit You
Alright, time to choose the right lashes! First off, you need to consider the length and width of the magnetic lashes you want. Make sure they match the shape and size of your eyes. I suggest starting with a shorter length if you’re new to magnetic lashes, just to get comfortable with them, then working your way up to a longer length once you’re used to it.
Also, consider the color of the lashes. If you’re going for a more natural look, you can opt for lashes that match your natural lashes. If you want a more dramatic look, choose a darker color than your natural lashes.
Trial and error is key to finding the perfect magnetic lashes, but with these tips in mind, you should be able to find your perfect match in no time.
Step 2: Apply Magnetic Eyeliner
So, now you’ve got your magnetic eyelashes ready, it’s time to apply the magnetic eyeliner. This is a crucial step in making sure your lashes stay in place all day long.
First things first, shake the bottle of magnetic eyeliner. This will make sure that the liner is fully mixed and ready to use. Once you’ve shaken it, you can start to apply it to your eyelids, just like regular eyeliner.
You should start at the inner corner of your eye and work your way outwards. Make sure you get right into the lash line, as this is where the magnets will attach. Don’t worry if you’re not great at applying eyeliner – the magnetic eyeliner is forgiving, and you can always adjust it if you need to.
Remember, when you’re applying the eyeliner, you want to make sure that you’re drawing a relatively thick, even line. This will give the magnets enough surface area to grip onto and help your lashes stay in place better. However, you don’t want it to be so thick that it looks obvious – aim for a natural, subtle look.
One final tip – make sure you let the eyeliner dry completely before applying the lashes. If you try to attach the lashes before the eyeliner is dry, they won’t stick properly and may end up falling off. I usually wait around 2-3 minutes to be safe, although your eyeliner’s drying time may vary.
Stick ‘Em Up: Placing Your New Magnetic Lashes
Now that you’ve got your magnetic eyeliner in place, it’s time to put on your lashes! Though it may seem tricky at first, the magnets built into each lash will make the process a lot less frustrating than traditional adhesive-based lashes.
Step 1: Align the magnets
The key to successfully placing your magnetic lashes is to make sure you align the magnets on the lashes with the magnetic eyeliner. Start by holding one lash strip above your eyelash line. Use your fingers to gently press the lash strip so that the magnets line up. Don’t worry, the magnets are strong enough to hold your lashes in place.
Step 2: Press down the lashes
Once the magnets are aligned with the magnetic eyeliner, hold the lash strip firmly in place. Gently press down on the lashes and eyeliner to secure them in place. Make sure you don’t move the lashes once they are in place, or else the magnets may become misaligned and your lashes won’t look as great.
If you’re having trouble getting the lashes to stick, try using a small amount of your magnetic eyeliner as a backup adhesive. The magnetic liner will help the lashes stay in place and look fabulous all day long.
Bonus tip: apply your lashes before mascara
If you want to add an extra flair to your eyes, consider applying your magnetic lashes before putting on mascara. This will give you a more dramatic look that you won’t be able to get with mascara alone.
And there you have it – our simple guide to placing your new magnetic lashes! With these easy-to-follow steps, you’ll be able to get the glamorous lashes you’ve always dreamed of, even if you weren’t born with them. Happy lashing!
Step 4: Check for Secure Placement!
Alright, we’re almost there! Now that you’ve got your magnetic eyelashes in place, it’s important to make sure they’re secure before you head out the door. The last thing you want is for your lashes to start falling off mid-day!
So, what do you need to do? First, gently press down on the lashes with your fingers. If they feel loose or wobbly, it’s time to adjust them. Use your fingers or a pair of tweezers to carefully realign the magnets until they snap into place.
Next, give the lash line a little wiggle with your fingers to make sure everything is sitting nicely. You want to make sure the lashes are as close to your natural lash line as possible for the most natural look.
Finally, give the lashes one more gentle press to make sure they’re secure. If they feel like they might come off, don’t panic! Just take them off and start again. It might take a little practice to get the hang of it, but once you do, it’s easy-peasy!
Remember, the key to keeping your magnetic lashes in place is a steady hand and a little bit of patience. Take your time, adjust as needed, and you’ll be batting those lashes all day long!
Step 5: Mascara? Sure, Why Not!
Now, this step isn’t mandatory, but if you want to go the extra mile in your quest for luscious lashes, grab your favorite mascara and get to work! Keep in mind that this step is entirely optional, and in some cases, applying mascara can actually weigh down your magnetic lashes.
But if you’re feeling bold and want to make your falsies blend seamlessly with your natural lashes, grab a mascara wand and apply mascara with a light hand. Start at the base of your natural lashes and work your way outwards, using a gentle, upward motion.
Just be sure not to overload your lashes with too much product, or your falsies may end up taking flight!
Conclusion: Let’s Get Those Lashes Poppin’!
Well, there you have it ladies! Magnetic eyelashes are definitely your new best friend when it comes to achieving that sultry, dramatic look without compromising your natural lashes. With just a few easy steps, you can have the lashes of your dreams – without the hassle of traditional falsies.I have to say, my personal favorite benefit of magnetic lashes is the ability to reuse them. No more disposable lashes for this gal! The magnetic method means I can wear them time and time again, saving me money and reducing waste. Plus, they’re just so darn easy to apply – even for someone like me who’s not great with makeup!It’s important to note that just like with any beauty product, some trial and error may be required to find the perfect fit and technique. But fear not! Once you’ve got the hang of it, you’ll wonder how you ever survived without magnetic lashes.So go ahead and give those lashes a little extra love, ladies. With magnetic eyelashes, the sky’s the limit!