
Welcome to My Makeup Routine! Because Let’s Face It, We All Need a Little Help
Hey there, I’m excited to share with you my makeup routine! I’m not a professional makeup artist, but I’ve learned a thing or two about how to create a flawless look. We all have our own unique faces and features, so it’s important to find what works best for you. Makeup can be a great way to express yourself and boost your confidence, but it can also be overwhelming to know where to start. That’s why I’m here to guide you through my go-to products and techniques. Whether you’re a beginner or a seasoned pro, I hope you find some helpful tips in my routine!
Primer: The Holy Grail of Makeup
Hey there, lovelies! Today, we’re talking about the most important step in any makeup routine – primer. As a makeup enthusiast, I’ve tried my fair share of products and nothing has made a bigger difference than a good primer. It’s the secret ingredient to a flawless, long-lasting look.
First things first, what exactly is primer? Essentially, it’s a base for your makeup. It creates a smooth canvas for your foundation to sit on, helping it to glide on more evenly and stay put for longer. Not only that, but it also minimizes the appearance of pores, fine lines, and wrinkles, blurs imperfections, and evens out your skin’s texture.
When it comes to choosing a primer, it’s important to consider your skin type. If you’re prone to oiliness, look for a mattifying primer that will help control shine. If you have dry skin, opt for a hydrating primer that will add moisture and give you a dewy finish. If you have combination skin, a primer with a more balanced formula is key. Don’t be afraid to try different brands and types until you find the one that works best for you.
Application is just as important as the product itself. After moisturizing (which should always be your first step), apply your primer all over your face using your fingertips or a brush. Make sure to concentrate on areas where you tend to get oily or where your makeup tends to wear off first. Allow the primer to soak in for a few minutes before applying your foundation.
Trust me, incorporating primer into your makeup routine is a game-changer. It not only helps your makeup apply better but also makes it last longer, saving you from constant touch-ups throughout the day. So, if you haven’t already, give it a try – your skin (and your makeup) will thank you!
Found the Right Foundation Yet? Here’s a Few Tips
Hi everyone! Are you ready for a makeup haul? Today we’re talking about one of the most important makeup items: foundation. If you have been struggling to find the perfect shade and formula, you are not alone! Here are some tips that have helped me and might help you too.
Know your skin type
Before you start shopping for a foundation, try to identify your skin type. Is it oily, dry, or combination? This will help you determine the type of foundation you should look for. If you have oily skin, for example, opt for an oil-free or matte finish foundation. On the other hand, if you have dry skin, look for a hydrating or luminous foundation.
Find your perfect shade
Choosing the right foundation shade is crucial for a flawless finish. To find your perfect match, test the foundation on your jawline in natural light. If it disappears into your skin seamlessly, congrats! You have found the right shade. If it looks too light, too dark, or ashy on your skin, keep testing until you find the right one.
Match the formula to your skin concerns
If you have specific skin concerns like blemishes, redness, or fine lines, look for a foundation formula that suits your needs. For example, a full coverage formula can help cover up blemishes and acne scars. A color-correcting formula can help neutralize redness and discoloration. A weightless formula can smooth out fine lines and pores.
Know when to apply and how much to use
A little goes a long way when it comes to foundation. Start with a small amount and build it up as needed. Use a beauty blender, brush, or your fingers to apply the foundation evenly. Don’t forget to blend it into your jawline and neck for a seamless finish. Also, if you are using different skincare products, make sure to wait a few minutes before applying the foundation to prevent pilling or patchiness.
That’s it for today’s tips on finding the right foundation. Hope you find them helpful and happy hunting! Do you have any tips or tricks? Leave them in the comments below.
I just can’t live without Concealer!
As someone who struggles with acne and dark under eye circles, concealer is an essential part of my makeup routine. For years, I struggled to find the right concealer that not only covered up my imperfections but also looked natural.
My biggest advice when it comes to finding the perfect concealer is to make sure you are choosing the right shade. Don’t go too light or too dark, as this will only accentuate the areas you are trying to cover up. Instead, choose a shade that matches your skin tone or is just slightly lighter.
Another tip when it comes to applying concealer is to use a light hand. Less is more in this case, as applying too much can leave you with a cakey or unnatural look. Instead, start with a small amount and build up as needed.
If you’re looking for extra coverage, try using a color correcting concealer before applying your regular concealer. Green can help cancel out redness, while orange can help with under eye circles. Just remember to blend well!
Last but not least, don’t forget to set your concealer with a translucent powder. This step is crucial in keeping your concealer in place all day, and preventing it from creasing.
Overall, concealer is an essential part of any makeup routine. Just remember to choose the right shade, apply with a light hand, and set with powder for a flawless finish!
Get Cheeky: How to Choose and Use Blush and Bronzer like a Pro
Hey guys!
When it comes to makeup, nothing beats having that healthy-looking, sun-kissed glow. And the best way to achieve that is by applying blush and bronzer. These two products can work wonders on your face, giving you that fresh, youthful vibe. But choosing the right shade and applying it can be tricky. Not to worry, though. Here are some tips to help you get the most out of your blush and bronzer.
First, choose the right shade
When it comes to blush, it’s important to find a shade that complements your skin tone. For lighter skin, pink and peach shades work well, while deeper skin tones can go for more intense shades like berry, plum, or even red. As for bronzer, opt for a shade that’s no more than two shades darker than your natural skin tone. For warm skin tones, choose a bronzer with a golden or red undertone, while cool skin tones are better suited to bronzers with a gray or pink undertone.
Next, apply it correctly
For blush, apply it to the apples of your cheeks, blending upwards towards your temples. Be sure to use a light hand and tap off any excess product before applying. For bronzer, apply it to the hollows of your cheeks, temples, and jawline, blending outwards towards your hairline. Remember to also apply a little bit to your neck and décolletage for a more seamless look.
Finally, experiment with different finishes
Whether you prefer a matte, satin, or shimmer finish, there’s a product out there for you. Matte products are great for a more natural, everyday look, while shimmery products add a touch of glam and are perfect for special occasions. Satin finishes are a happy medium between the two, giving you a healthy, luminous glow.
So, there you have it. With these tips, you’ll be well on your way to achieving the perfect blush and bronzer look. Remember to have fun with it and don’t be afraid to try new things!
6. Eyeshadow: My Expert Tips
Okay guys, let’s get real. Eyeshadow can be tricky, especially if you’re just starting out. But fear not! As someone who has made every eyeshadow mistake in the book (seriously, all of them), I’ve got some expert tips to help you achieve that perfect eye look.
First things first: the base
Before we even dive into eyeshadow shades and techniques, let’s talk about the base. It’s crucial to start with a clean and primed eyelid. This means using an eyeshadow primer or a concealer to create a smooth base. Not only will this help your eyeshadow last longer, but it’ll also make the colors pop.
Don’t forget about transition shades
You’ve probably heard beauty gurus talk about “transition” shades before, but what are they? Essentially, a transition shade is a color that works as a bridge between your skin tone and the darker eyeshadow shades you’ll be using. This helps create a seamless, blended look. A neutral brown or taupe shade is perfect for this step.
Blend, blend, blend
The key to making your eyeshadow look flawless is blending. Seriously, you can have the most beautiful eyeshadow shades, but if they’re not blended properly, it’ll look messy. Grab a fluffy blending brush and blend the darker shades into the crease, using circular motions. Take your time with this step, and remember to blend upwards and outwards for a natural look.
Experiment with different textures and finishes
Don’t be afraid to mix and match different eyeshadow textures and finishes. Matte shades are great for creating depth and definition, while shimmery or metallic shades can add some sparkle. If you’re feeling bold, try a glitter shade on the lid for a pop of glam.
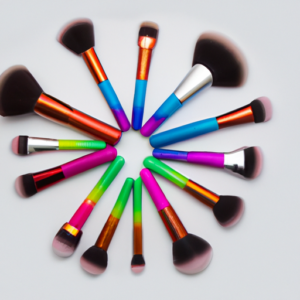
Invest in good brushes
Last but not least, invest in good quality eyeshadow brushes. Trust me, it makes a world of difference. Look for brushes with soft, synthetic bristles that blend easily and don’t shed. And don’t forget to wash them regularly!
With these tips, you’ll be an eyeshadow pro in no time. Happy blending!
Mascara: The Secret to Fluttery Lashes!
When it comes to makeup, mascara is my holy grail product. I cannot leave the house without a swipe or two of this magical wand. A good mascara can take your look from drab to fab in seconds.
But picking the right mascara can be a daunting task. With so many options out there, how do you know which one to choose? Here are some tips and tricks that I have picked up over the years that have helped me find the perfect mascara.
First and foremost, consider your lash type. Do you have short lashes that need lengthening? Or long lashes that just need some volume? Understanding your lash type can help you narrow down your options and find a mascara that will give you the desired effect.
Next, pay attention to the brush. The shape and size of the brush can play a big role in the application process. A curved brush can lift and curl your lashes, while a thick brush can add volume. Experiment with different brushes to find the one that works best for you.
Another important factor to consider is the formula. Do you want a waterproof mascara for those hot summer days? Or do you prefer a smudge-proof formula that won’t budge throughout the day? Look for mascaras that are also infused with ingredients like vitamin E or biotin to help strengthen and nourish your lashes.
And lastly, always remember to apply mascara to both your upper and lower lashes for a complete look. Don’t be afraid to layer on multiple coats for a more dramatic effect. Just be sure to let each coat dry before applying the next.
Mascara truly is the cherry on top of any makeup look. With these tips, you’ll be able to find the perfect mascara to take your lashes to new heights!
I can’t leave the house without my eyeliner – Here’s why!
Let me tell you, eyeliner is a game changer! It can transform your whole look from casual to edgy in just minutes. I love experimenting with different types of eyeliner – liquid, gel, pencil, you name it. But my absolute favorite is the liquid eyeliner.
Using liquid eyeliner gives me more control over the line I create. Plus, it stays put all day without smudging or fading. One pro-tip I’ve learned is to start my line at the middle of my eyelid and then work my way outwards towards the wing, making sure to keep the line as close to my lash line as possible. This creates a clean and defined line.
Another thing to keep in mind is the color of your eyeliner. If you have lighter eyes, brown or gray can be a beautiful alternative to black. If you’re feeling bold, try experimenting with colored eyeliner – shades like emerald green and royal blue can really make your eyes pop.
Finally, don’t forget to finish off your eyeliner with a coat (or two) of mascara. This will help enhance your lashes and give your eyes an even more dramatic look.
So there you have it – an eyeliner can change everything! Whether you’re going for an everyday look or something more daring, experiment with different types and colors to find what works best for you. You might just be surprised by how much your eyeliner can transform your makeup routine!
Let’s talk Lips: Lipstick and Lipgloss
Okay, let’s get real. Who doesn’t love a good lip color? Whether you’re a lipstick fanatic or a gloss girl, there’s no denying the power of a good lip product. But with so many options out there, it can be overwhelming to choose the right one for you. Fear not, because I’m here to give you some expert advice on how to rock your pout like a pro.
First things first, let’s talk about lipstick. When it comes to choosing a shade, it’s important to consider your skin tone. Those with fair skin should go for lighter, more natural shades like pink or nude, while those with darker skin tones can play around with bold and bright colors like reds and purples. It’s also crucial to find a formula that works for you, whether it’s matte, satin, or glossy. I personally love a good matte finish, but if you prefer a more hydrating formula, go for something with a satin or glossy finish.
Now, let’s move on to lipgloss. Gloss is perfect for those days when you want a subtle hint of color and a bit of shine. You can wear it alone or on top of your favorite lipstick for a more amplified look. When choosing a gloss, be sure to look for something hydrating and non-sticky. Trust me, no one likes the feeling of their lips sticking together every time they talk or take a sip of water. Opt for something with a smooth and lightweight texture for maximum comfort.
One final tip: don’t forget about lip liner! A good lip liner can help define your lips and prevent your lipstick or gloss from bleeding or smudging. Choose a shade that matches your lipstick or opt for a clear liner that works with any color. And always remember to apply it before your lip color for the best results.
So there you have it, my expert tips and tricks for choosing and rocking the perfect lip color. Now go out there and rock that pout!
I Can’t Do My Makeup without Setting Spray: Here’s Why
Hey there! I’m here to tell you why I never leave my house without setting spray. Honestly, it’s become a staple in my makeup routine, and I can’t imagine doing my makeup without it.
You see, setting spray is the ultimate finishing touch. It helps to lock in your makeup, preventing it from smudging or melting off throughout the day. I don’t know about you, but there’s nothing worse than spending time perfecting your makeup, only to have it slide off your face in the middle of the day.
But, setting spray does more than just keep your makeup in place. It also helps to blend your makeup together, giving you a flawless and cohesive finish. If you’re someone who doesn’t love the look of heavy makeup, but still wants that flawless finish, setting spray is the perfect solution.
Another reason why setting spray is so important is that it helps your makeup to look more natural. By blending everything together and locking it in place, you don’t have to worry about your makeup looking cakey or overdone. Instead, you’ll have a dewy and natural-looking finish.
Finally, setting spray helps to hydrate your skin throughout the day. This is especially important if you have dry or dehydrated skin, as it can help your makeup to look more radiant and prevent it from drying out and flaking off.
Overall, setting spray is an essential part of any makeup routine. It helps to lock in your makeup, blend everything together, give you a natural-looking finish, and keep your skin hydrated throughout the day. Trust me, once you start using setting spray, you’ll wonder how you ever did your makeup without it!
The big finish: My final thoughts on makeup application
Well folks, there you have it – my rundown on the basics of makeup application. It’s been a wild ride! I hope you’ve taken some helpful tips away from our journey together.
First and foremost, always remember that makeup is meant to enhance your natural beauty, not cover it up or make you look like someone else. However, that doesn’t mean you can’t have a little fun and experiment with different looks!
One of my biggest pieces of advice is to invest in good quality products – they’ll thank you in the long run. Plus, take the time to tailor your products to your skin type and tone. Trust me, it makes a world of difference.
When applying makeup, don’t be afraid to try new techniques. It may take some practice, but you’ll get the hang of it eventually. And don’t stress out if your makeup doesn’t look perfect – beauty is all about imperfections!
Finally, remember that makeup is just one aspect of beauty. Confidence, kindness, and authenticity are what truly make a person beautiful. So, go out there and rock your look with pride!
Thanks for joining me on this journey. Happy makeup-ing!
FAQs About Glam Makeup
How to do a glam makeup look for beginners?
Okay, so, if you want a glam makeup look, you gotta start with a stunning base! You need a good primer to make your skin smooth and ready for your foundation. After that, I suggest choosing a high-coverage foundation to get that flawless finish. Don’t forget to blend it well using either a beauty blender or a brush. Now, let’s talk cheekbones! I love using bronzer to contour my face and give more definition to my features. You can also add a little bit of blush to bring some color to your face. After that, highlighter is your best friend! Put some on the high points of your face, like the cheekbones, the tip of your nose, and your cupid’s bow.For the eyes, it depends on your preference. If you want a more dramatic look, go for some smoky eye with dark colors like black, dark brown, gray, or navy blue. Don’t forget your eyeliner and mascara to make your eyes pop even more. If you want a more natural look, choose some lighter and more shimmery tones for your eyeshadow.Finally, the lips! A bold color like red, burgundy, or dark pink can add some serious glamour to your look. But if you prefer a more subtle look, go for some softer and neutral colors. And always, always, make sure your lipstick matches your outfit and your mood!I hope these tips help you create your own glam makeup look. Experiment with different products and techniques until you find what works best for you. Have fun and feel beautiful inside and out!
What is a glam makeup look?
Oh, honey, let me tell you, a glam makeup look is all about going BIG. It’s all about looking bold, fierce, and confident. To achieve that, you’ll need a few key makeup items. First up, you need a foundation that provides full coverage. You want your skin to look flawless, so go for a foundation that matches your skin shade perfectly and provides good coverage. I recommend using a beauty blender to apply it. Next, you’ll need to focus on your eyes. A glam look usually involves smokey eyes, so you’ll need an eyeshadow palette with some dark and shimmery shades. You’ll also need eyeliner and mascara. Remember, bigger is always better when it comes to your lashes! To finish off the look, you’ll need a bold lip color. Reds, oranges, and pinks work great for glam looks. You can also add some contouring to give your face more definition. Make sure to blend it well! And don’t forget the highlighter… it’s the key to that beautiful glowy skin. Now, remember, a glam look is all about confidence. So don’t be afraid to experiment, try out new things and find what works best for you. And most importantly, have fun with it!
What is soft vs full glam makeup?
Well, for a glam look, I typically start with a primer to create a smooth base for the makeup. Then, I use a foundation that matches my skin tone and provides full coverage. After that, I go for a contour and highlight to bring out my cheekbones and add definition to my face. For the eyes, I like to use a neutral or smokey eyeshadow and add some false lashes for that extra oomph. Lastly, I finish off the look with a bold lip color, usually a red or dark plum shade.Now, when it comes to soft vs full glam makeup, the difference is mainly in the intensity of the look. Soft glam is more natural and subtle, while full glam is all about drama and impact. Soft glam typically involves more muted colors and a light hand with the application, while full glam can include bold colors, heavy contour, and a lot of shimmer. The choice really depends on your personal preference and the occasion you’re getting ready for. If I’m going to a formal event or a night out, I tend to go for full glam. But for everyday wear or more casual events, I opt for a softer glam look.