Hey, guys! Are you looking for that perfect look with defined cheekbones and a chiseled jawline? Well, have I got the solution for you – a contour kit! Now, I know what you’re thinking – “What even is contouring?” Simply put, contouring involves using makeup to create shadows and highlights on your face, giving it dimension and structure. And a contour kit is a set of products that are specifically designed for this purpose. But before you rush off to buy one, let’s talk about what you need in a good contour kit. In my experience, there are six essential products that you shouldn’t be without: foundation, concealer, bronzer, highlighter, blush, and setting powder. These products will help you achieve a perfect sculpted look in no time! So, let’s dive into the world of contouring together and get ready to slay!
Essential Products for a Contour Kit
Alright, ladies and gents, let’s get down to the nitty-gritty of creating a flawless contoured look. To start, you will need six essential products to create your contour kit. First up is foundation. A smooth base is fundamental to any makeup look, and it is no different with contouring. Foundation helps to even out your skin tone and create a consistent canvas to work on. Next, grab your trusty concealer – this magic potion will help to conceal any imperfections you don’t want to see. I personally like to use a shade that is one to two shades lighter than my natural skin tone to highlight the areas I want to accentuate. Now, on to the star of the show – bronzer! This versatile product is a must-have in any contour kit because it will help to create dimension on your face, making those cheekbones pop and giving your jawline definition. If you are unsure about what bronzer shades to choose, check out this link to get all the deets on how to should match your bronzer and contour: Should Bronzer and Contour Match? Moving on, we have highlighter. Similar to concealer, this product gives your skin a radiant glow. Use it on your cheekbones, brow bone, inner corners of your eyelids and bridge of your nose to add a touch of radiance to your entire look. Additionally, adding blush to your contour brings life and warmth to your skin. It also helps to add more dimension to your cheeks. Lastly, don’t forget that setting powder. Use it to set your contour in place, ensuring that it lasts all day – no smudging, smearing or sweaty mess! Remember, with the right products and application techniques, your contour will stand-out and compliment your natural beauty.
Get Your Contour Kit Ready: Additional Tools You Need
Aside from the essential products, there are additional tools that you need to make your contouring game on point. As a makeup artist, I have learned that having the right tools in my kit is just as important as having the right products. Here are some additional tools that you need to have in your contour kit:
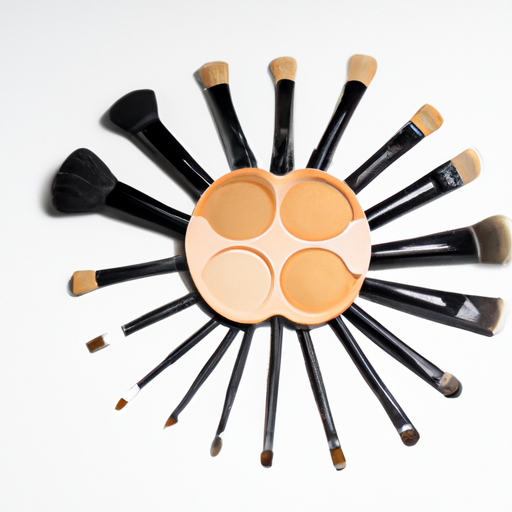
1. Brushes and Sponges
When it comes to contouring, the brushes and sponges you use can make all the difference. A small, angled brush is perfect for applying bronzer and contour powder, while a fluffy brush is best for applying highlighter. A damp makeup sponge is great for blending and creating a natural-looking finish. Don’t forget to clean your brushes and sponges regularly to avoid bacteria buildup.
2. Contour Palette
Instead of buying separate contour, highlight, and blush products, invest in a contour palette. This will save you money and space in your kit. Look for a palette that has a variety of shades that will work with different skin tones. Make sure to swatch the shades and test them on different clients before adding it to your kit.
3. Setting Spray
Setting spray is a must-have to keep your contour game strong all day long. After you’ve applied all your contour products, use a setting spray to lock everything in place. This will prevent your makeup from smudging or fading throughout the day. Bonus points if you choose a setting spray that has a dewy finish.

Having the right tools in your contour kit will make your makeup application process much easier and more enjoyable. Don’t be afraid to invest in quality tools that will last you a long time.
Mastering the Art of Contouring: Tips for Flawless Application
Okay, so you have all the necessary tools and products for your contour kit. But do you know how to use them effectively? Applying makeup can be tricky, especially when it comes to contouring. Here are some tips from a makeup enthusiast who has spent years perfecting the art of contouring.
Preparing the Skin
Before diving into the world of contouring, it’s essential to prepare your skin. Make sure to cleanse and moisturize your face before applying makeup. It will create a smooth base, making it easier to blend the products. Apply a primer to the areas where you’ll be applying the contour kit to ensure lasting and even coverage.
Placement of Products
One of the most crucial aspects of contouring is understanding where to place the products. For example, the bronzer should be applied in the hollows of your cheeks and on either side of your nose, while the highlighter should be applied on your brow bone, cheekbone, and the bridge of your nose.
Application Techniques
When applying contouring products, use a light hand and build up the product gradually. Start with a small amount and blend it outwards. Use tapping motions for the foundation, and sweeping motions for the bronzer and blush. Make sure to blend the products properly to avoid any harsh lines.
Blending
Blending is a crucial step in contouring. It allows the products to look natural, seamlessly blending into your skin. Make sure to blend the products properly to avoid any harsh lines. Use a damp beauty sponge to blend out any harsh lines, and use a fluffy brush for blending the bronzer, blush, and highlighter.
With these tips, you’ll be able to master the art of contouring in no time. Remember, practice makes perfect. So keep practicing until you achieve your desired look. Happy contouring!
Wrap it Up: My Final Thoughts
Well folks, that’s a wrap on our contouring journey! Hopefully, you’ve gained some insights into the wonderful world of contouring and how to create a stunning, sculpted look using your contour kit.Remember, a little goes a long way when it comes to contouring, so don’t be too heavy-handed with your products. Always start with a lighter application and gradually build up if necessary.Proper preparation is also key to getting a flawless finish. Make sure to exfoliate, moisturize, and prime your skin before applying any products from your contour kit for the best results.Lastly, there’s no one “right” way to apply your contour products – experiment with different techniques until you find what works best for you! With practice and patience, you’ll be a contouring pro in no time.So go forth and contour with confidence!