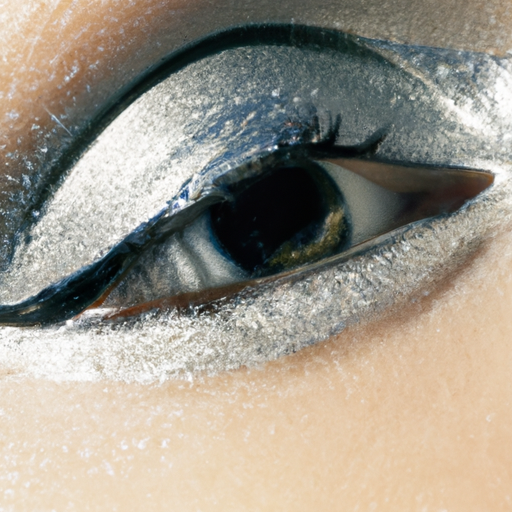
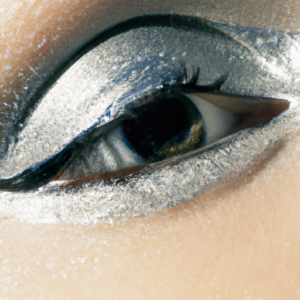
Are you ready to make a statement with your look? Winged eyeliner is the perfect way to do just that! From Taylor Swift to the girl next door – this trend is still going strong. That’s why I’m here to give you the low-down on achieving the perfect cat-eye look!
Believe it or not, there’s a bit of a science behind rocking the perfect winged eyeliner. But don’t worry – if I can master it, so can you! In this post, I’ll walk you through my foolproof step-by-step guide to everything you need to know about applying winged eyeliner.
Eye-Area Prep: How to Do It Like a Pro!
So you’re ready to rock your killer winged look, but don’t forget the basics first. Before you even start thinking about how you’re gonna line your eyes, make sure you get your eye area prepped and ready—and that means cleanse and moisturize.
You want to go ahead and give your face a quick wash. Use something gentle and natural, like a mild facial cleanser or coconut oil. This’ll help kickstart your skincare routine, taking off any dirt and makeup from your day. Once you rinse off your cleanser, apply a light layer of moisturizer—you can also use an eye cream or oil for extra hydration.
Once you’ve got your moisturizer on, it’s time to prime! Primers put a protective barrier between your skin and makeup, allowing it to stay in place longer and look smoother. You could go for something clear, or find a tinted option to cover up any redness or discoloration. Just dab a tiny bit on your finger and lightly glide it over your lids. Easy peasy!
Choosing an Eyeliner
When it comes to rocking that sultry, winged eyeliner, the type of liner you choose is super important. After all, who wants a botched look that can turn into a full-on disaster? With all the options out there, like liquid, gel, pencil and pen liners, it can be easy to get overwhelmed. Don’t worry though: I got you! Let’s break it down!
Liquid liners tend to be the most popular among beauty mavens. They come in either a bottle with a brush or felt tip applicator, which makes applying a sharp line pretty easy. Gel liners are another great option for those looking for a dramatic eye look. You’ll need an angled brush to work this creamy formula, making it a bit more challenging to apply for a novice user. Pencil and pen liners are ideal for those just starting out with wings—the texture of these formulas is softer, making them easier to use.
You should also consider color when picking an eyeliner. If you want to stay classic, brown and black are always safe choices. Or switch it up with something a bit more fun, like navy blue or black/gray combo. Bottom line: no matter what you choose, make sure it won’t smudge or fade after a few hours!
Applying the Eyeliner
Once you’ve got an eyeliner in hand, it’s time to zero in and apply—no sweat. Start with a thin line along the upper lash line. I like starting near the inner corner of the eye working outwards. Then take care to flick out the end—it can make all the difference in defining your eyes. Connect that first line with the flick and fill in any gaps. As a pro tip: use short brush strokes for a smoother look.
Now you’re done with the main part; it’s time for the finishing touches. Follow up with a coat of mascara on your top, and bottom lashes (if desired). Then, ta-da! Conceal any mistakes with a dampened small brush or sponge, and there you have it.
Finishing Touches
Now that you’ve flicked out the end and connected your line, it’s time to give that winged eyeliner a polished look. To really make your eyes stand out, why not try adding mascara? It’ll help define those lashes and complete your look.
But if you’re like me, sometimes you can make a mistake or two with liquid liner. Don’t let a blunder ruin your whole night! Just grab a small concealer brush or makeup sponge and dab away any mistakes. You don’t want your eyeliner to look like a hot mess!
And that’s how you ace winged eyeliner every time. With a few easy tips and a steady hand, you’ll be able to create that classic cat eye with no fuss. So go ahead – get out there and slay the makeup game!
Conclusion: A Wrap-Up of Winged Eyeliner Steps
Well, here we are – it’s time to say goodbye to winging your eyeliner! In this guide, I’ve taken you through all the steps of achieving the perfect look, from prepping the eye area to mastering that flick at the end. It can take a bit of practice so don’t be discouraged if you don’t get it right away – just keep trying and soon enough you’ll master this makeup look.
So remember: start with a clean face and moisturized eyes. Choose the right type of eyeliner – I recommend liquid liner or a felt-tip pen. Start off thin and work your way up. Then, flick out the end and finish off by connecting the line and filling in. Add some mascara, conceal any mistakes and voila! You’re good to go.
Thanks for joining me on my journey to mastering winged eyeliner. I hope you learned something new and that now you can step out looking flawless – and wowing everyone who sees you.
FAQ on Winged Liner
How can I get the eyeliner wing right the first attempt?
Well, achieving perfect winged eyeliner ain’t no picnic. I’m here to tell ya, it takes some dedication and practice to get that perfect flick. But, with some staying power and a few tips, you can master the perfect wing every time.
First up, you’re gonna need some patience and the right tools. Investing in a good eyeliner, like a liquid or gel, and an angled brush, are the best way to ensure that perfect line.
The technique is also key. I suggest starting from the outer corner of your eye and working inward in small strokes, creating the desired shape. It’s best to take it slow and steady. This can prevent runs in the line and also give you more control.
One more tip: use your eye as a guide. As you make your way from the corner of your eye, use your lower lash line as the natural outer corner. Think of the line as an extension of your eye.
After you’ve got the shape, use a lighter color to soften the line. This can make the liner look less harsh and add a bit of smokiness to the look.
These are tips I’ve picked up over the years; trust me, they’ll help you achieve the perfect winged eyeliner every time.
How do you find the perfect angle for eyeliner?
When it comes to achieving the perfect winged eyeliner, the key is in finding the right angle. It sounds daunting at first, but with a few simple tips and tricks you can master it in no time.
First thing’s first: use your natural eyelid crease as a guide. Holding up a mirror, line a pencil or other thin cosmetic tool from the corner of your eye up toward your eyebrow and make a slight angled mark. This will create the template you need for the perfect winged shape.
Next, grab your eyeliner pencil or brush, and trace along the line you just marked. Keep a steady hand and move slowly and carefully to draw a smooth line. Once you get to the angle you marked, angle your pencil up toward the end of your eyebrow, keeping the line as thin or as thick as you’d like.
Now comes the fun part: adding the wings! Again using your pencil or brush, draw an even line extending out slightly past your marked angle. Make sure to keep it as even and symmetrical as possible. For an extra touch, you can make a thin triangular shape at the end of the wing, creating the classic winged eyeliner look.
And there you have it! With a bit of practice and patience, you too can master the art of winged eyeliner. So, go ahead and give it a try. Who knows, with the right angle, you may become a winged eyeliner pro in no time!
Why is my winged eyeliner never even?
When it comes to achieving the perfect winged eyeliner look, it can be quite challenging. The good news is that with practice and some expert advice, you can master it in no time. I’m here to tell you that it’s totally doable and there are some tips and tricks that can help you get it right every time.
First and foremost, start with the right tools. Make sure you have a good quality eyeliner that is easy to control and is the right texture for your look. After you have the right supplies, make sure to prep your eyelids with an eyeshadow primer. This will help the eyeliner stick and stay in place all day.
Next, you need to draw the line. Start by creating a thin line at the inner corner of your eye, and work your way outward. Since you’ll be creating wings, this line should get slightly thicker as you move. When you get to the end of the wing, make sure you draw a thin, sharp line. Don’t worry if it’s not perfect the first time. It might take a few tries to get it just right.
To get the wings even, you should use some kind of guide. You can use tape, a business card, or even a spoon to create the perfect shape. Place the guide at the outer corner of your eye, and draw a line from the inner corner of your eye to the guide. Then, remove the guide and fill in the wings with the eyeliner.
Finally, blend out the wings with an angled eyeshadow brush. This will help to soften up any harsh lines and make the wings look more natural. And there you have it—the perfect winged eyeliner look! Have fun experimenting, and don’t forget to keep practicing until you get it just right.