So, you want to learn the ropes of individual false lashes, do ya? Well then you’ve come to the right place. False lashes can make your natural beauty pop and give you a beautiful flair that’s sure to make heads turn. Though they might look a bit intimidating at first, don’t fret! Once you understand the basics and practice a few times, you’ll be shoppin’ for lashes in no time! Let me break it down for ya – individual false lashes are tiny clumps of artificial lashes that each look like one eyelash. With patience and the right know-how, you’ll be ready to flutter them lashes in no time.
There are some major benefits of wearing individual false lashes – better length and thickness, less messy than applying mascara, and more comfortable than traditional strips of falsies. You can also customize them as you see fit if you’re looking for something more unique. So grab your lash glue and tweezers and let’s get on with the show. I’m gonna let you in on all the ins and outs of rocking those falsies so you’ll be blinking brighter before you know it.
Preparing Your Natural Lashes
Getting your own lashes ready for a set of individual false lashes is key for getting a natural look. After all, you don’t want to have your falsies standing out! So, start this process by giving your peepers a good clean. Grab some cotton wool and eye makeup remover and give your eyes a gentle swipe. Then apply a light coat of mascara. You don’t wanna go OTT with the mascara, as that can make it harder to blend the false lashes in.
The next step is to make sure you choose the right false lashes. While there are loads of different styles, lengths and thicknesses available, the key here is to pick something that looks somewhat natural when applied. If in doubt, opt for something that is a bit thinner than usual, as they will be easier to blend.
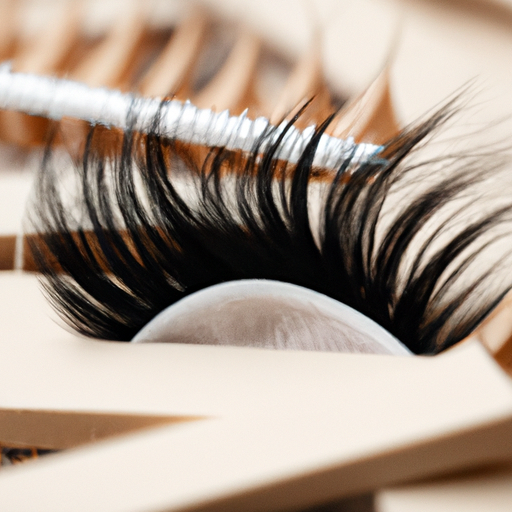
Choosing the Right False Lashes
When it comes to choosing the right kind of individual false lashes, you need to really take your time and make sure you get the right length and thickness. Some people may have a natural look in mind, while others might be aiming for a more dramatic finish.
If you’re going for a natural look, then a light, subtle set of individual false lashes should do just the trick. Clusters are great for this as they often come with shorter hairs which gives them a delicate appearance. Alternatively, if you’re after a more dramatic look, you can opt for longer, thicker individual lashes to give your eyes that extra shine.

The length is another major factor that should be taken into consideration when selecting individual false lashes. You want to make sure that the lashes don’t exceed your natural lash line, otherwise you’ll end up with an artificial-looking outcome. It’s best to go for lashes that are slightly shorter than your natural eyelashes, as this will help achieve a more natural result.
Finally, the thickness of your individual false lashes can also vary greatly depending on the look you’re trying to achieve. While some people prefer thicker lashes to give themselves a fuller appearance, others might opt for thinner lashes to maintain a more natural look. So, it’s all about finding the balance between too thick and too thin.
Applying Individual False Lashes
You’ve got your lashes picked out and prepped—now it’s time to make ’em stick! Nothing beats the natural look of individual false lashes; you just need to know how to apply them. Here are some tips for getting lashes that stay put.
I recommend using lash glue instead of a DIY adhesive. Lash glue will help keep your falsies on better and won’t irritate your skin like other adhesives can. Apply glue along the base of the lashes, then wait a few seconds for the glue to dry slightly before pressing the lash into place.
To get the perfect angle, grab a pair of tweezers or an applicator tool. Then place the lash onto your lid, close to the root of your natural lashes. Make sure you’re not placing the strip too far up, otherwise you’ll end up with a fluttery look. Once the lash is in the right spot, gently press down all along the base to secure it.
If you want extra drama, go ahead and stack a few rows of lashes together. Keep in mind that more lashes can give more dramatic results, but they can also start to look unnatural if you pile on too many. So be wary when adding multiple layers—it’s better to keep it simple than to wind up with a weird spider-eye look.
It’s also important to curl your lashes after applying falsies. This will enhance the fan effect and create a more natural look. And once your lashes have been curled, finish off with a light coat of mascara to blend everything together.
And that’s it! With practice and patience, you’ll be able to master the art of applying individual false lashes. Soon enough, you’ll be rocking a natural and beautiful eye look that nobody will believe isn’t real!
Finishing Touches
Alright, you’re almost done! Now it’s the time to give your lashes the perfect final touch.
First, use an eyelash curler to give your real and false lashes a little bit of extra curl. This will help blend the look of your natural and false lashes together. Make sure not to curl too much, or you might end up with clumpy-looking lashes.
Next, you’ll want to coat your lashes in mascara. Just a light layer of mascara will do. This will help to blend the individual lashes even more and will also give your lashes that full and fluttery look you’ve been wanting.
Pro tip: Do each eye one at a time! That way, you can make sure you’ve got enough mascara on the false and natural lashes without having to worry about it drying too quickly.
And there you have it — the perfect, natural lashes! With a few simple steps, you can get that glamorous look without looking like you have too much going on.
Conclusion
Well, I don’t know about you, but after spending some time getting to grips with individual false lashes and mastering the tips and tricks of application, I’m feeling pretty darn good. For starters, although it may seem intimidating, applying individual false lashes isn’t that big a deal if you take the time to do it right. Choosing the right thickness and length for your eyes, cleaning and prepping the natural lashes beforehand, and taking the time to curl them and use lash glue properly will really pay off. The finished look? You’ll have super glamorous eyes that gals would kill for.
Plus, the best part is that once you get the hang of it, putting on individual false eyelashes becomes second nature. Just remember to keep your eyes open when you apply the adhesive – and voila! Your own little secret to stunningly beautiful peepers.
False Lash Application FAQ
Do individual lashes look more natural?
Yes, individual false lashes can give you a more natural look than cluster lashes! Applying one lash at a time is the key for a natural look. To get the most natural result, try to use individual lashes that are closest to your natural lash length and thickness. Don’t go too crazy with the length and thickness of your false lashes—it’ll look more obvious when placed on your eyelid!
When applying individual lashes, use a thin layer of glue. Make sure to let the glue get slightly tacky before applying the lash to your natural lash line. Apply the false lashes as close to your natural lash line as possible. Once applied, use a lash comb or spoolie brush to gently blend the false lashes with your natural lashes.
If you’re worried about individual lashes falling off, try using a waterproof adhesive. This will help keep the lashes in place all day long. Finally, don’t forget to apply mascara after you’re done with the false lashes—this will help to blend the false lashes with your real lashes and give you a more natural look.
How can I make my eyelashes look like falsies naturally?
If you’re looking to get a natural look with individual false eyelashes, the best way to go about it is by taking your time. Eye makeup application should never be rushed—especially when it comes to false lashes. Plus, since you’re dealing with individual lashes, you don’t want to go overboard with the look. Otherwise, you could end up with a really unnatural look!
When picking out individual lashes for a natural look, go for shorter, more subtle ones so you can blend them in with your existing lashes. Keep the glue thin—not too thick or chunky, or you could end up messing up the entire look. And don’t forget to use tweezers or lash applicators to apply the lashes! You don’t want to end up with a giant, clumped-up mess.
When you’re done applying those individual lashes, don’t forget to curl them. This will help blend your false lashes with your real ones, ultimately giving you a natural-looking finish. And don’t forget to use mascara for added definition and a more natural look. Just make sure it’s lightweight!
Finally, for ultimate natural-looking results, you can consider applying eyeliner before applying the lashes. Once you’re done with the individual lashes, go over the lash line with a soft-tipped eyeliner to hide any gaps or irregularities that may have been created.
Do individual lashes pull out your natural lashes?
No, individual false lashes won’t pull out your natural lashes—if you apply them properly.
But getting that natural look requires finesse—it’s not as simple as just gluing them on. For one thing, you want to make sure you choose the right length for your own natural lashes. And secondly, you’ve got to be really careful when it comes to the application process.
To get the perfect natural look, start by cutting your individual lashes to the size you need. Then, use tweezers to pick up the lashes one by one. Make sure you don’t pull on your natural lashes when you’re doing this!
Now, here’s where it gets tricky. You want to make sure you apply the individual lashes as close to the base of your natural lashes as possible. This ensures that the lash line looks seamless. And if the glue is too strong, you might end up pulling out some of your natural lashes when you remove the false ones. So make sure the glue is just right.
And finally, you want to make sure you use some mascara to blend the false lashes in with your natural ones. This will make sure you get that natural look you’re after.
So as you can see, with the right technique and products, you can achieve a natural look with individual false lashes without damaging your natural lashes.