Introducshun: Gettin’ Started With Eye Makeup Like a Pro!
Hey there, all you makeup enthusiasts out there! Ready to dive into the wonderful world of eye makeup? Well, you’ve come to the right place. In this guide, I’m gonna spill the beans on how to create eye-popping looks that’ll have everyone turning their heads.
Now, don’t fret if you’re new to this whole makeup gig. We’re gonna start from scratch and build your skills up to expert level. And hey, even if you’re already a seasoned pro, stick around, ’cause you might just pick up a handy trick or two along the way.
But first things first, let’s gather up the necessary supplies. Trust me, you don’t wanna be mid-makeup and realize you’re missing an essential tool. So, girl, grab your favorite drink, sit back, and let’s get ready to rock your eye makeup game!
Gather the Necessary Supplies
Alrighty, folks! Time to gather up all the important tools for our fabulous makeup journey. Here’s what we need:
Primer Me Up!
First things first, we gotta start with a trusty primer that’ll keep our makeup locked in place all day long. This magical potion ensures a smooth canvas for our artistry, filling in any pesky pores and creating a flawless base. Don’t skip this step, darlings!
All Hail the Colors!
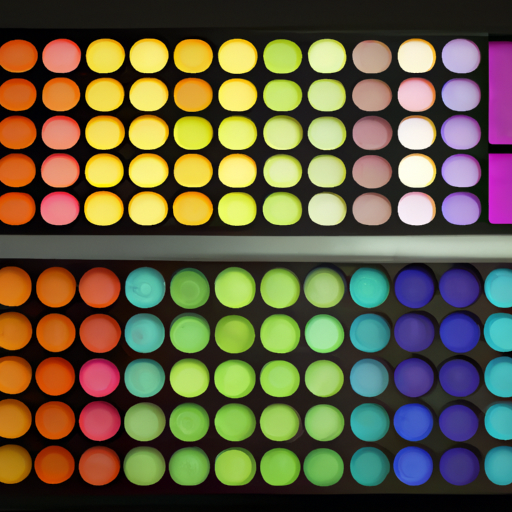
No masterpiece is complete without a dazzling color palette. Choose your shades wisely, my friends! Whether you’re aiming for a subtle day look or a bold nighttime vibe, make sure to have a range of shades that will help you create your desired look.
Get Your Base On!
Time to whip out that foundation! Start by applying a small amount and gradually build it up for that naturally flawless finish. Remember, we’re aiming for a balanced complexion, not a cakey disaster!
Crease it to Believe it!
To add depth and dimension, it’s all about the crease color, honey! Find a shade that complements your eye color and gently apply it in your crease using a fluffy brush. Blend, blend, blend until the colors seamlessly merge together.
Blend and Smudge, Baby!
Now, this is where the magic happens! Use a clean blending brush to softly blend and smudge your eyeshadow, creating that dreamy, blurred effect. Keep blending until your makeup game is on point, and those colors look like they were naturally bestowed upon you by the makeup gods.
The Finishing Touch
No eye makeup is complete without a touch of mascara and liner. Grab your favorite mascaras and give those lashes the va-va-voom they deserve. Finish off with a winged eyeliner for that extra dose of fierce. And voila, you’re ready to conquer the world!
You’ve got all the supplies, dear makeup enthusiasts! Get your brushes ready, unleash your creativity, and let’s paint those gorgeous faces!
Start with a Primer
Okay folks, let’s get this makeup party started! The first step in achieving a flawless eye look is to always, and I mean always, start with a primer. Trust me, this little beauty secret is a game-changer that you won’t want to skip. A primer is like the foundation for your eyeshadow, creating a smooth canvas and helping your colors pop. Think of it as a magical potion that helps your eyeshadow last longer and prevents those annoying creases. So, grab your favorite primer, squeeze out a small amount, and gently apply it to your eyelids. Make sure to blend it in using light, sweeping motions. Oh, and don’t forget to allow it to dry before moving on to the next step!
4. Choose Your Colors
Alright, now we’re getting to the fun part! When it comes to choosing colors for your eye makeup, the world is your oyster. You can go bold, subtle, or somewhere in between. It all depends on your personal style and the occasion. However, there are a few key things to keep in mind that can help you make the best color choices.
Firstly, consider your eye color. Certain shades can make your eyes really pop. If you have blue eyes, warm shades like bronze or copper can enhance their cool hue. For brown eyes, earthy tones like olive green or deep purple can make them appear even more mesmerizing. Green or hazel eyes often look stunning with shades of purple or burgundy. Have fun experimenting and playing with different color combinations to see what works best for you!
Next, think about your skin tone. The goal is to find colors that complement your complexion rather than clash with it. If you have fair skin, softer shades like pastels or light neutrals can create an ethereal, romantic look. For medium or olive skin tones, warm shades like gold or copper can bring out your natural glow. If you have darker skin, don’t be afraid to go bold with vibrant jewel tones or deep metallics that really make a statement.
Another factor to consider is personal preference and the occasion. Are you going for a daytime look or getting ready for a night out? For a subtle daytime look, go for neutral shades like beige, taupe, or soft browns. If you’re looking to amp up the drama for a night out, consider deeper, smokier shades like charcoal gray, navy, or even black. Remember, there are no hard and fast rules – it’s all about expressing yourself!
Lastly, don’t be afraid to experiment and mix different colors together. You can create stunning gradient effects or even play with contrasting shades to make your eyes really stand out. Just remember to blend, blend, blend! A well-blended eye look can make all the difference.
So go ahead and let your imagination run wild. Whether you’re keeping it subtle or going all out, the most important thing is to have fun and feel confident in your choice of colors. Happy experimenting!
5. Apply the Base Color
Alrighty, it’s time to get the party started and apply that base color! This is the foundation, the canvas upon which we’ll create our masterpiece. So grab your trusty eyeshadow brush and let’s dive in!
Before we begin, make sure your eyelids are clean and dry. You don’t want any oils or leftover makeup interfering with the application. Now, let’s talk about choosing the right color for your base. Think about your desired look—do you want something natural and subtle, or bold and vibrant? Whatever your preference, go ahead and select a shade that matches your vision.
Once you have your chosen eyeshadow color, tap your brush into the pan to pick up the product. Now, here’s a little pro tip. Instead of applying the color directly to your eyelid, start by dabbing a bit of eyeshadow onto the back of your hand. This allows you to control the intensity of the color and make sure it’s evenly distributed on your brush.
Now, close your eyes and gently sweep the brush across your eyelid, starting from the inner corner and moving towards the outer corner. Feel free to build up the color gradually until you achieve your desired level of pigmentation. Remember, it’s easier to add more color than to take it away, so start with a lighter hand and go from there.
As you’re applying the base color, pay attention to the shape you’re creating. You can use the brush to slightly extend the color beyond your natural crease for a more elongated look, or keep it within the boundaries of your lid for a more classic style. It’s all about personal preference, so don’t be afraid to experiment!
Once the color is applied, take a step back and admire your handiwork. The base color sets the tone for the rest of the eyeshadow look, so make sure it’s beautifully blended and evenly applied. Now, we’re ready to move on to the next step and add some depth with a crease color. Stay tuned, folks!
Add Depth with a Crease Color
Now that we’ve got a solid base color down, it’s time to really amp up the eye look! And how do we do that? By adding depth with a crease color, my friends. This step is crucial in creating dimension and making your eyes pop. Trust me, you won’t believe the difference it makes!
So, what exactly is a crease color? Well, it’s a slightly darker shade that you apply to the natural crease of your eyelid. This technique helps to define and contour your eye shape, giving it that gorgeous shape you’ve been dreaming of. It’s like giving your eyes a little extra oomph, you know what I mean?
When it comes to choosing your crease color, think about what works best with your eye shape and desired overall look. If you’re going for something more natural, opt for a matte brown shade that complements your skin tone. For a bolder and more dramatic look, you might want to experiment with darker hues like deep purples or sultry blues. Don’t be afraid to play around and find what works best for you!
Now, let’s get down to business. Start by picking up some of your chosen crease color using a fluffy eyeshadow brush. Tap off any excess product and lightly apply the color along your natural crease. Remember, less is more, so start with a small amount and build it up gradually. You can always add more, but it’s harder to take away, you dig?
As you’re applying the crease color, use a windshield-wiper motion to blend it out. This helps to create a seamless transition between the different shades and prevents any harsh lines. We want those colors to melt together like butter on a hot pancake, baby!
One pro tip I have for you is to use a clean blending brush to soften up the edges. This will give you that gorgeous gradient effect and make your eyeshadow look super professional. Trust me, it’s the secret to achieving that flawless and blended eyeshadow look you see on the gram.
And there you have it, my friends! You’ve successfully added depth to your eye look by incorporating a crease color. See how simple it is to take your eye makeup game to the next level? Now, go on and rock that stunning eye look with confidence!
Blend and Smudge
Now it’s time to get that seamless, sultry look. Grab your blending brush and let’s blend those eyeshadow colors together like a pro. You want to make sure that there are no harsh lines between the different shades. In other words, we want everything to look blended to perfection.
Begin by using small, circular motions to blend the colors, working from the outer corner of the eye towards the center. This is the secret to achieving that desirable gradient effect. The goal is to create a seamless transition between the different colors, so take your time and be patient with the blending process.
Once you have blended the colors to your liking, it’s time to add some smudged definition to your look. Take a smaller, domed brush and dip it into your darkest eyeshadow shade. Apply this shade along the upper and lower lash lines, starting from the outer corner and working inward. This will give your eyes a smoky and smudged appearance, adding that extra touch of allure.
Don’t forget to blend out the smudged lines to soften the look and create a more effortless vibe. Use the same blending brush you used earlier and gently sweep it over the smudged lines. This will help to blur the edges and create a more seamless finish.
Remember, blending and smudging are key techniques to achieve that professional and polished eyeshadow look. So take your time, don’t rush through these steps, and enjoy the process of creating a mesmerizing gaze.
8. Finish with Mascara and Liner
Oh boy, we’re reaching the final step of this fabulous makeup look! Now it’s time to add some drama to those lashes and define those eyes with killer mascara and liner. Trust me, this step is a game-changer!
First off, grab your favorite mascara and start by wigglin’ that wand at the base of your lashes. Slowly work your way up, coating each lash with that magical formula. Don’t be afraid to wiggle it a little to separate those lashes and give ’em some serious volume. If you want to go all out, apply a second coat for that va-va-voom effect!
Next, it’s time to line those beautiful eyes. Take a trusted eyeliner pencil or pen and gently line your upper lash line. You can go for a classic thin line or get a bit bolder with a winged look. Just remember to stay steady and take your time for those precise lines.
Hey, if you’re feeling adventurous, why not add a little something extra? Grab a colored liner to really make those eyes pop! Try a vibrant blue or a sultry purple – it’s all about expressing your personality and having fun with your look.
Lastly, don’t forget about those lower lashes! Grab your mascara wand once more and lightly coat those lower lashes to complete the eye-catching effect. Just be careful not to smudge it – we want those lashes to stand out, not become a hot mess!
So there you have it, my friends – you’ve reached the end of this makeup journey with me. Those lashes are on fleek, and those eyes are ready to mesmerize. Now go out there with confidence, rock that stunning look, and show the world what you’re made of!
9. Conclusion
Well, folks, we’ve come to the end of our makeup adventure! It’s time to wrap things up and admire our masterpiece in the mirror. After following all the previous steps, you should be flaunting a fabulous and perfectly blended eye makeup look.
Remember, practice makes perfect when it comes to applying eye makeup. So, don’t get discouraged if your first attempt doesn’t turn out exactly how you envisioned it. Keep experimenting, have fun with different color combinations, and soon enough, you’ll become a pro at creating stunning eye looks that turn heads wherever you go.
I hope this blog has been helpful in guiding you through the process of achieving picture-perfect eye makeup. By gathering the necessary supplies, starting with a primer, choosing the perfect colors, and applying them just right, you can elevate your eye game to the next level.
Don’t be afraid to get creative and try out new techniques or products. Remember, makeup is all about self-expression and enhancing your natural beauty. So, embrace your inner artist, have confidence in your abilities, and rock those gorgeous eye looks with pride!
That’s a wrap, folks! Now, go out there and slay those eye makeup looks like the makeup queen or king you were born to be!
FAQs About Smokey Eye
What are the rules for smokey eye?
Oh, boy, do I have some tips for beginners wanting to rock a smokey eye! First things first, ya gotta start with a good eyeshadow primer. Trust me on this one, it’s gonna make a world of difference in keeping that smokiness in place. Once you’ve got your primer on, it’s time to choose your colors. Don’t be afraid to go for those rich, dark shades like deep browns, purples, or even black. They’re gonna give you that sultry, mysterious vibe you’re looking for. Now, here comes the important part: blending. Girl, you gotta blend those colors like your life depends on it. Use a fluffy brush and gently blend those shadows together, creating a seamless gradient. This is gonna make your eyes pop and avoid any harsh lines. Finally, add a touch of shimmer on your lid and inner corner to really make those eyes sparkle. And, voila! You’ve just mastered the art of the smokey eye. Trust yourself, have fun, and don’t be afraid to experiment, sister! Go slay that smokey eye game!
How to do a simple black smokey eye?
To rock a killer black smokey eye, here’s my foolproof technique! First off, grab a dark black eyeshadow that suits your style. Start by priming those peepers with an eyeshadow base, ensuring a long-lasting look. Now, go ahead and softly apply the black eyeshadow onto your eyelid with a fluffy brush, focusing on the outer half of your lid to create depth. Remember, less is more, so start with a light hand and build up the intensity slowly.
Next, take a blending brush and gently buff the edges of the black shadow, diffusing any harsh lines. This step is crucial in achieving that seamless, sultry effect. Don’t be afraid to blend, blend, blend! The key here is to create a gradient, seamlessly transitioning from deep black to your natural skin tone.
Now, let’s intensify that sultry smokiness even more! With a smaller brush, lightly line your lower lash line with the same black eyeshadow, focusing on the outer corner. This will add drama and balance to your look. Feel free to smudge it out for a softer effect or leave it bold and striking.
Time to amp up the drama with a touch of shimmer! Dab a glittery silver or gunmetal shade onto the center of your lids, right above your pupil. This will catch the light and make your eyes pop. Don’t forget to blend the shimmer into the black shadow for a seamless finish.
Pro tip: To enhance the overall smokiness, line your upper lash line with a black eyeliner pencil, and for some extra va-va-voom, wing it out! Lastly, complete the look with a couple of coats of mascara to give your lashes that irresistible volume.
Remember, practice makes perfect, so don’t get discouraged if it’s not runway-ready on your first attempt. The key is to experiment, play with different shades, and find what works best for your unique features. Give it a go, have fun, and rock that smoldering black smokey eye like a makeup pro!
How to do smokey eye with pencil?
Alrighty, here’s how I rock a smokey eye using a pencil. First things first, sharpen that pencil nice and sharp to get precision. Then, I start by applying a neutral eyeshadow as a base all over my lids, this makes blending easier. Next, I take the pencil and draw a thick line along my upper lash line, going from the inner to the outer corner. Now comes the fun part, grab a smudger brush or even a cotton swab and gently smudge that line upward and outward. This creates a smoky effect. Remember, don’t press too hard, we want a soft and sultry look. For added drama, I like to line my lower lash line as well, smudging it out for a more intense smokey eye. Finally, finish off with a couple coats of mascara, and voila! You’ve got yourself a gorgeous smokey eye using just a pencil. Easy peasy, right?
how do you do a smokey eye for beginners?
So, you wanna know how to rock a smokey eye, huh? Well, let me break it down for ya! First things first, grab yourself some neutral eyeshadow shades like charcoal gray, deep brown, or even black. These shades will give ya that sultry, smoldering vibe. Now, start by applying a lighter shade all over your lid and blend it out. Then, take a darker shade and apply it to the outer corner of your eye in a V shape. Blend, blend, blend, my friend! Next, line your upper lash line with a black eyeliner, and if you’re feelin’ extra bold, go ahead and smudge it out a bit. Finish off that smokey look with a few coats of mascara and voila! You’ve got yourself a killer smokey eye look that will turn heads wherever you go. So, go ahead and rock that smokey eye, girl! You got this!