
Are You Ready to Contour Your Way to a Glowing Face?
Contouring is a makeup technique that involves using makeup to create shadows and highlights on the face, making it look sculpted and defined. It’s a technique that is used by makeup artists and beauty enthusiasts worldwide, and with good reason. Not only does it make your face look more defined, but it can also create the illusion of a slimmer face. So why not give it a try?
Alright, now it’s time to get our face ready for the contour masterpiece. First things first, I always make sure to thoroughly cleanse my skin to ensure that there isn’t any dirt or oils left on my face. This step is crucial in creating a smooth base for the makeup to adhere to. After cleansing, I like to moisturize my skin using a lightweight lotion or serum. This step is essential in keeping the skin hydrated and also helps the makeup blend smoothly.
Let’s Talk Foundation
Before diving into the actual contouring process, it’s essential to make sure that you have the right foundation. After all, it’s the foundation that provides the base for the rest of your makeup. Make sure that you choose the right shade of foundation that matches your skin tone perfectly. I always recommend choosing a matte finish foundation as it helps the contouring process by allowing the powders to blend smoothly and evenly without shifting.
Identify Areas to Contour
Now it’s time to examine your face and identify the facial features that you want to contour. Typically, you want to focus on enhancing your cheekbones, and jawline, and slimming the nose. Start by sucking in your cheeks and using the hollows as a guide for where to apply the contour powder. Next, use a smaller brush to apply the contour powder along the jawline and the sides of your nose.
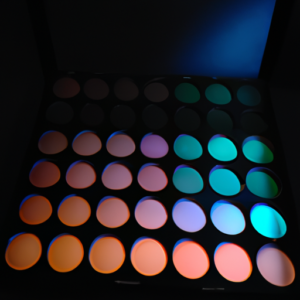
The Right Shade of Contour Powder
Choosing the right shade of contour powder is crucial in getting the perfect blend. Depending on your skin tone, you may want to opt for a cool-toned powder or a warmer-toned one. I always recommend testing out a couple of shades on your skin and choosing the one that is closest to your skin tone. Remember, the shade should be darker than your foundation but not so dark that it looks fake or ashy.
While contouring may seem intimidating at first, it’s easier than it looks. With a little bit of practice, you’ll be transforming your face into a work of art in no time. Don’t forget to check out winkseyelashboutique.com for more tips on achieving the perfect makeup look.
Get Your Glow On: Applying Contour Makeup
Alright, now that we’re prepped and ready to go, it’s time to dive into the good stuff: applying the contour makeup. Here’s how I do it:
Step 1: Choose the Right Foundation
First things first. Your base is a critical component of your contour, so it’s essential to find the right foundation for your skin tone. You want your foundation to match your neck, so it doesn’t look like you’re wearing a mask. Also, keep in mind what finish you want (e.g., dewy or matte) and what coverage level (e.g., sheer or full).
Step 2: Identify Areas to Contour
Once your base is set, it’s time to identify the areas on your face where you want to apply the contouring makeup. Everyone’s face is different, but some common places to contour include the cheekbones, forehead, jawline, and nose.
Step 3: Select the Right Shade of Contour Powder or Cream
This step is critical! Choosing the wrong shade of contour can make it look like you have dirt on your face (not cute). With powder, choose a shade that’s about two shades darker than your skin tone. For cream, choose a shade that’s only one shade darker. This will give you a more natural look.
Step 4: Apply Contour Product
Using your chosen product, apply it to the areas you want to contour. Do so in a light, feathering motion and build up gradually. Remember, it’s easier to add more than to take away.
Step 5: Blend and Diffuse the Contour
Blending and diffusing are critical steps to making your contour look natural (read: not like you’re wearing face paint). Use a clean brush or sponge to blend out the areas where you applied contour.
Step 6: Highlight with a Light Powder
The final step in completing your contour is to highlight! Grab a light powder and apply to the high points of your face. This will help to make you look more awake and refreshed.
Step 7: Set Makeup with Setting Spray
Finally, take a couple of mists of your favorite setting spray to lock everything in place. This will help your makeup last longer and keep you looking fresh all day.
Perfecting Your Look: The Finishing Touches
Now that we’ve covered the basics of contouring, it’s time to perfect your look with a few finishing touches. These tips will help add that extra shine and ensure your contouring lasts all day.
Highlight with a Little Pow-Pow
After you have contoured your face, use a light powder to highlight the areas you want to bring forward. This could be the upper cheekbones, the bridge of the nose, or the center of the forehead. Be light-handed with your powder and gradually build it up until you reach your desired level of highlight.
Set Your Makeup Babe
Setting spray is your friend. After you have highlighted your face, it’s important to set your makeup to make it last all day. With your eyes closed, spritz a setting spray all over your face to keep your contouring in place. This finishing touch ensures you look as good at the end of the day as you did when you first applied your makeup.
Final Thoughts, My Darlings
When it comes to contouring, it’s all about balance. You want to enhance your natural beauty without going overboard. Start with a light hand and gradually build up your contouring until you find the perfect balance. Remember that practice makes perfect. With these finishing touches in mind, experiment with different styles and have fun with your look. You Got This, my beauties!
Ah, the Finished Product! My Tips for a Glowing, Sculpted Face
So, you’ve mastered the art of contouring. Congratulations! Through practice and effort, you can now achieve a sculpted face that is perfect for any occasion. Before you jump into your daily routine, let me summarize some of the key points we’ve covered:
First off, we defined contouring as the strategic use of makeup to highlight and sculpt the different planes of the face. By doing so, you can achieve a more flattering, dimensional look that enhances your natural beauty. The benefits of contouring are numerous, and include everything from slimming down your face to accentuating your best features.
But before you dive into contouring, always remember to prep your skin beforehand. Cleansing and moisturizing are key, and will help ensure that your makeup goes on smoothly and stays put throughout the day.
Now, let’s get to the fun part! When applying your contour, choose the right foundation to create a stable base. After that, identify the areas you want to contour and select the right shade of product to match your skin tone. Remember that a little bit goes a long way, so start small and build up as necessary. Then, it’s time to blend and diffuse the contour, using the right techniques to create a seamless, glowing look.
Finally, don’t forget to add some finishing touches to your face. This might include highlighting with a light powder to accentuate your cheekbones, or setting your makeup with a setting spray to make it last all day.
Overall, the key to perfecting your contouring routine is practice and experimentation. Everyone’s face is different, so it’s important to find what works best for you and adapt as necessary. By doing so, you can achieve a stunning, sculpted look that leaves you feeling confident and beautiful.